
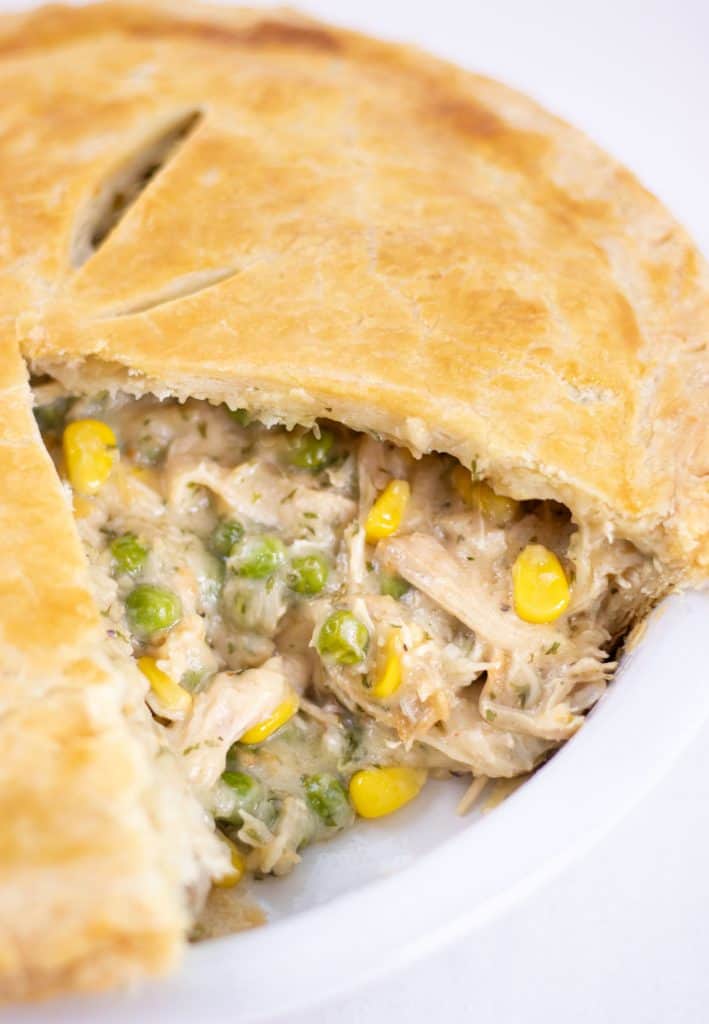
Happy Thanksgiving to all of my Canadians! With the festivities in full swing I figured that this would be the perfect time to share my Chicken Pot Pie!
Let me ask you this first, who has about 10 pounds of leftover Turkey in their fridge right now? You do?! Well you can use that leftover turkey in this chicken pot pie recipe!!! Genius I know.
If making a chicken pot pie from scratch sounds a little daunting. Don't worry, I am here to walk you through it step by step! (I promise it is a lot easier than you are thinking)
Pie Crust
The buttery, flakey homemade pie crust is step one.
Let me just say this right from the beginning, you can use a pre-made, store bought pie crust for this recipe.
BUT, I encourage you to try making this homemade one. It is so easy, once you get the hang of it you will be cranking out pie crusts for everything, and it won't take you any longer than 10 minutes!
A few housekeeping rules:
- Do not overwork the pie crust, folding in the water is the KEY.
- See Sweet Dough Pie Crust for step by step picture instructions.
- You want to see chunks of butter in the crust. When the pie crust is baked, the butter melts and creates savoury flakey layers.
The first step is cutting in the butter and vegetable shortening. To do this you will need a pastry cutter. A pastry cutter is a handheld tool that has a kind of blunt cutting edge on the bottom, kind of like a potato masher.
You use the pastry cutter and press down directly on top of the butter/shortening. Keep repeating this until all of the butter and shortening is broken up into pea sized lumps in the flour. As I mentioned above, having these lumps in the dough is CRUCIAL to the success of your pie crust.
After you are satisfied and have a lumpy dough you add the ice water. When I say ice water, I mean literally put ice cubes in the water (just don't scoop the ice cubes into the dough!).
Why is using ice water so important?
Using ice water ensures that the butter does not melt! This is also the reason that the dough is folded together with a spatula and not your hands. (Because your hands will produce heat, which equals melting butter)
If the butter melts before it is cooked your pie crust will be dense and greasy. Yuck.
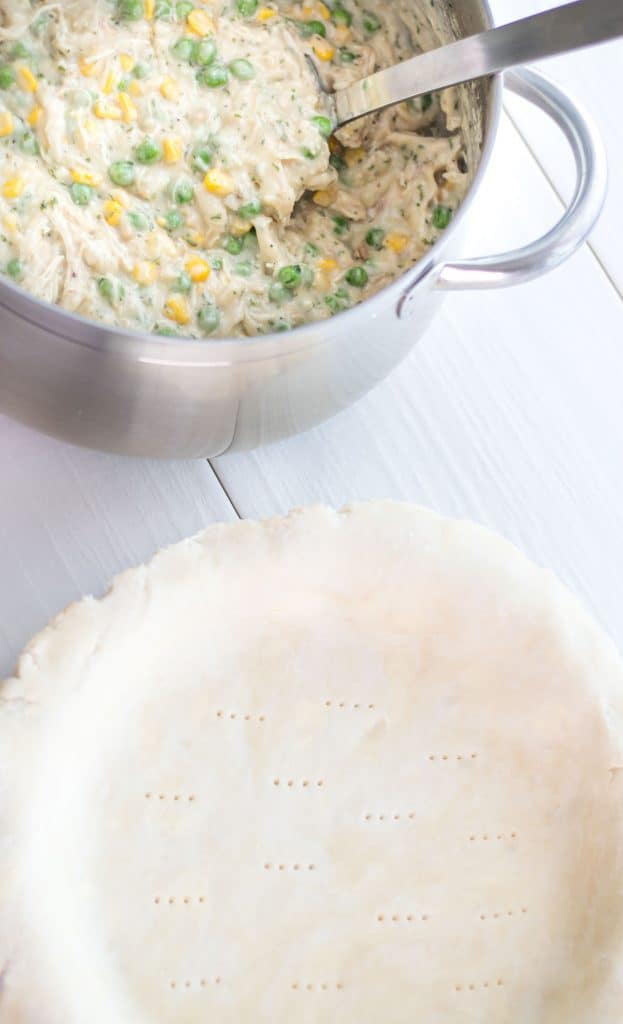
Pot Pie Filling
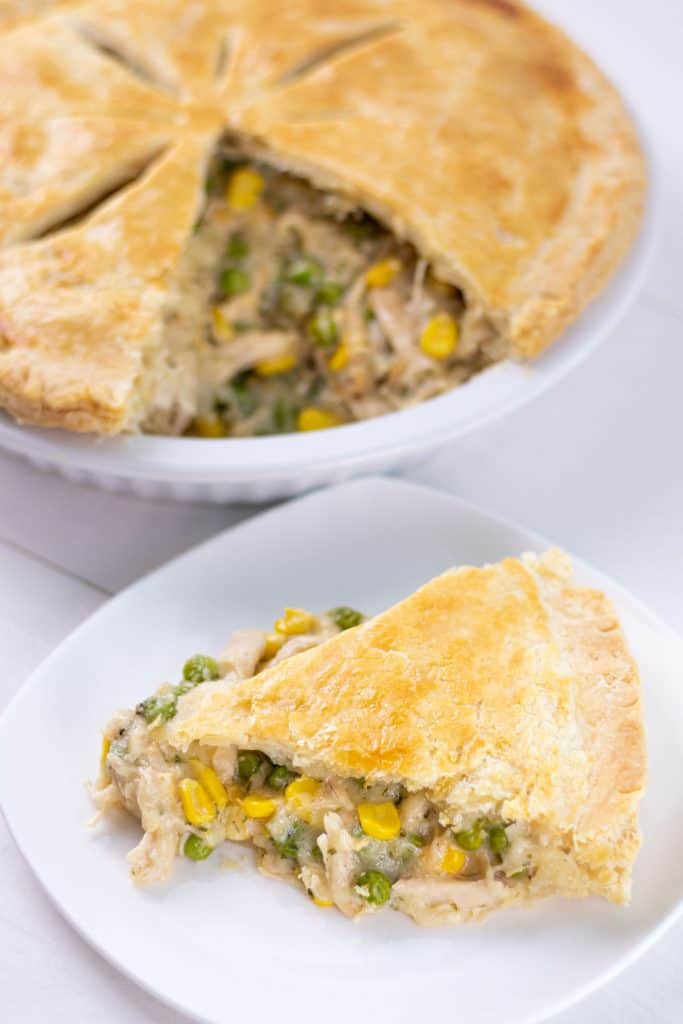
The filling is made with shredded chicken or turkey, peas, corn, onions, garlic. Basically all of the fall-y flavours. If you'd like some more flavor in your chicken, make a whole roasted chicken and use the meat from that for this pot pie recipe! Then, while you're at it, use that roasted chicken to make bone broth and use that in place of the chicken stock, too!
Then it is thickened using a roux, and flavoured with spices and chicken broth.
Creating a creamy, velvety, and hearty meal that will make you feel cozy all winter long!
One thing to note if you are using chicken breast. Leaving the drippings of the chicken in the pot equals major added flavour! I like to scrape the bottom of the pot while the butter is melting, deglazing it so all of the yummy chicken bits get incorporated into the final product.
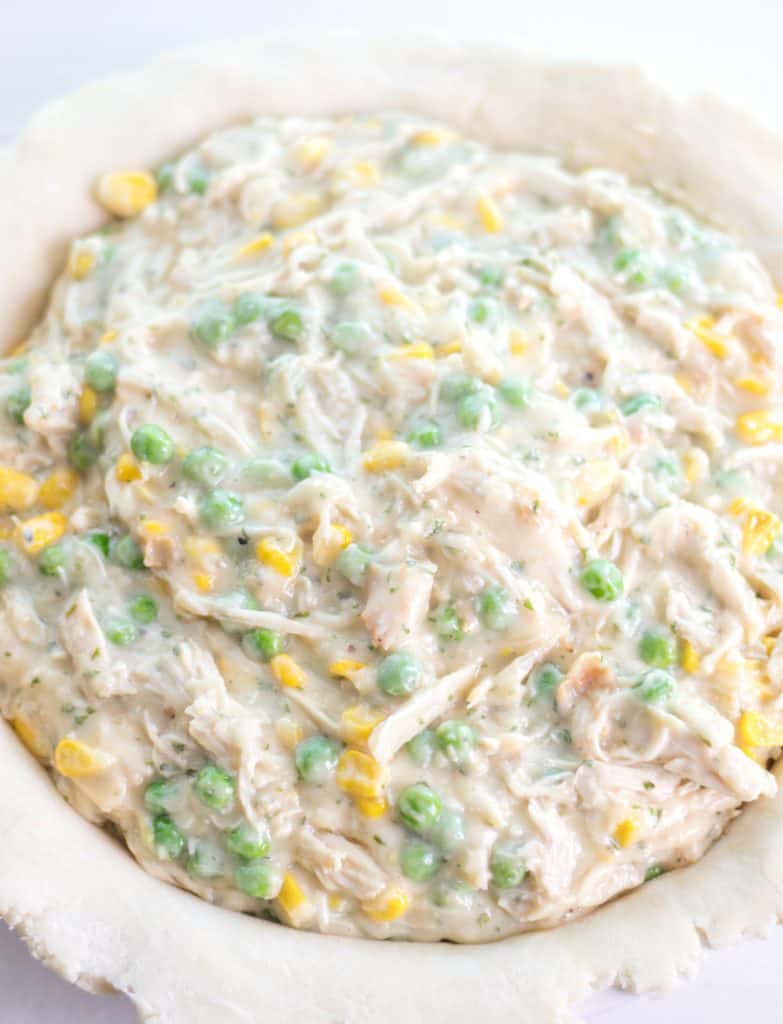
Step One; Fill the pie crust with the chicken pot pie filling.
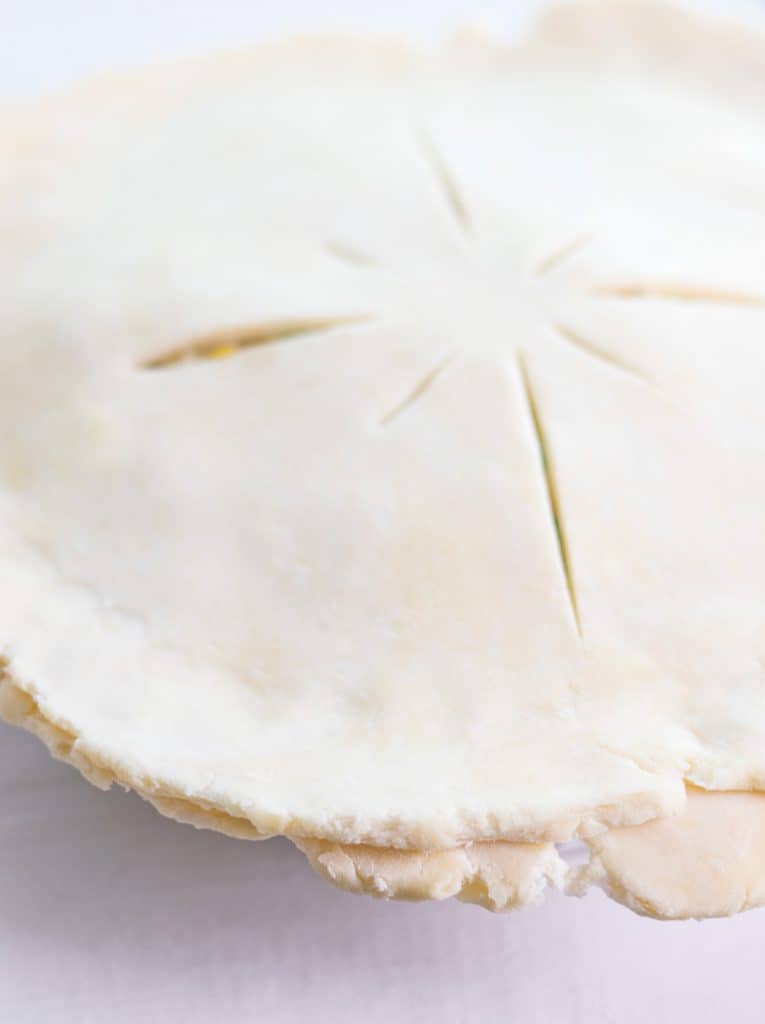
Step two; brush the edges with the egg mixture and adhere the top crust.
Save This Recipe! 💌
Step three; Trim the excess crust from around the pie plate.
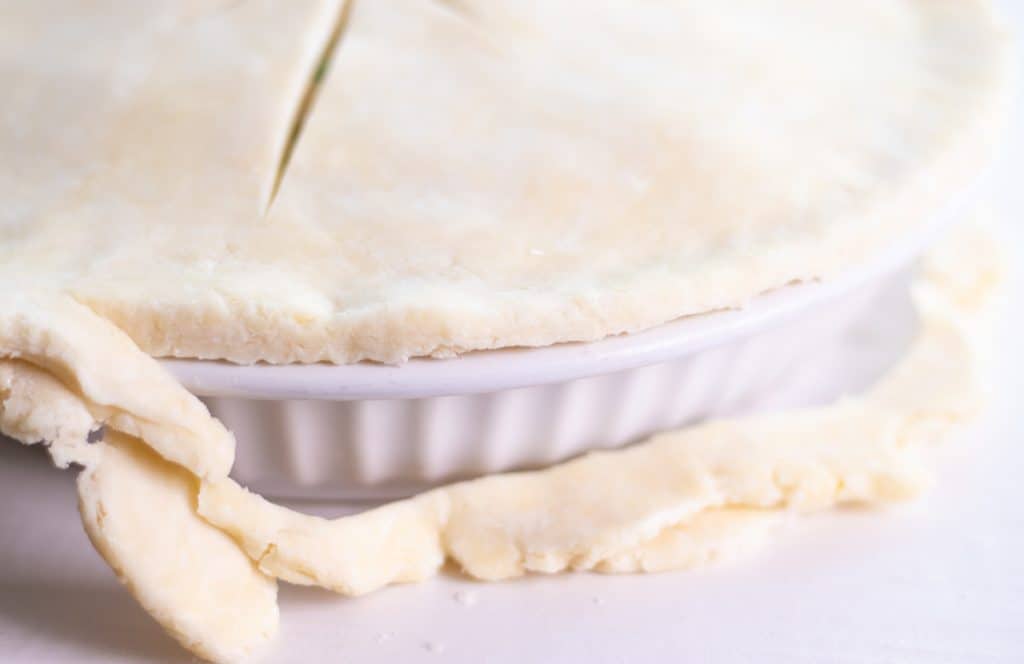
step four; Crimp the edges of the crust and brush with egg mixture.

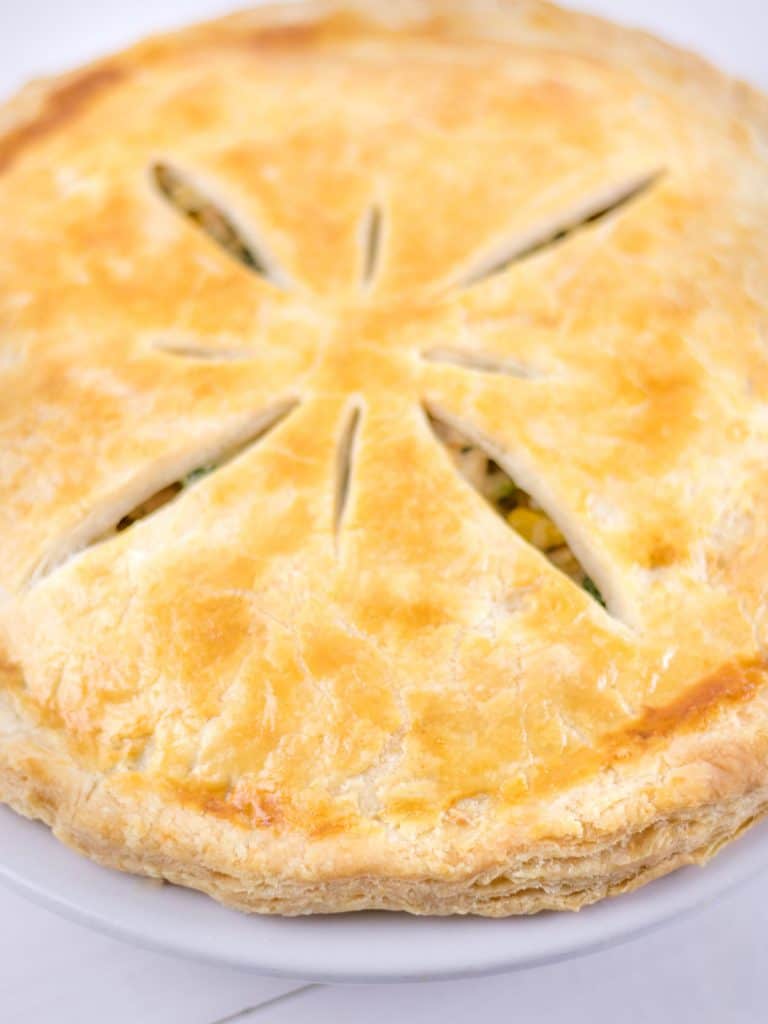
Step Five; Bake and enjoy! (look at those layers)
Freezer Meal!
I very often make these as freezer meals and they turn out FABULOUS. All you have to do is skip the brushing the final egg on top and don't do the final bake.
Tightly seal the top of the pie plate with wrap and freeze for up to 3 months.
When you are ready to eat it, preheat the oven to 375°F, brush some whisked egg on top and bake from frozen for approximately 1 ½ hours.
or, make mini pot pies!
You can also use this recipe to make miniature pot pies using ramekins! These pot pies are the perfect size for a personal pie. This recipe makes 6 mini pies (depending on the size of your ramekins).
To transform these into mini pot pies follow the same directions for the filling. For the dough, you will need to cut circles that are slightly larger than the ramekins that you are using.
Pie Crust Math (the only kind of math that I like)
To get the correct diameter for the circles that you will need measure across the top of your ramekin at the largest part. Then measure down one side on the inside and multiply that number by 2. Now take your top measurement + the side measurement = the diameter of circle that you have to cut out for each ramekin. For the top crust you will only need the measurement from the top of the ramekin.
Example: Bottom Crust; Top of ramekin 4", side of ramekin 2"x 2" = 4"
4" + 4" = 8" diameter for bottom crust.
For the top crust you will need only a 4" circle.
If you run out of dough, but still have scraps from cutting the circles just gather it up and knead it a few times. You might have to re-roll the dough to get enough for the last one.
Then these can either be baked right away, or packaged up using the freezer instructions above.
We put a lot of work into our recipes, we would love to know if you tried this recipe and how it turned out for you!
If you have any questions about this recipe, I would be happy to answer them in the comments down below!
To get a hold of us, you can shoot us an email or leave a comment down below! We can also be found on Instagram, Facebook, Twitter, or Pinterest.
📖 Recipe

Chicken Pot Pie
↑ click the stars to rate this recipe ↑
Print Recipe Pin RecipeIngredients
Pie Crust
- 2 ¼ cups All Purpose Flour
- ½ cup Butter cold
- ½ cup Vegetable Shortening cold
- 1 teaspoon Granulated Sugar
- ½ teaspoon Kosher Salt
- ½ - ¾ cup Water ice cold
Filling
- 3 Chicken Breasts (OR 4-5 cups of Leftover Turkey, shredded)
- 2 Tablespoons Extra Virgin Olive Oil
- Salt & Pepper to taste
- ½ cup Butter
- ½ cup Onion finely diced
- 4 cloves Garlic minced
- ¾ cup Flour
- 2 ¾ cups Chicken Stock
- 1 cup Frozen Peas
- 1 cup Frozen Corn
- ½ cup Heavy Cream
- 1 Tablespoon Dried Parsley
- 1 large Egg
- 2 Tablespoons Water
Instructions
Pie Crust
- Cut the butter and vegetable shortening into smaller cubes (1"-½" cubes) and place in the freezer for 10 minutes.
- In a large bowl combine the flour, sugar, and salt. Add the cold butter and vegetable shortening to the bowl. Using a pastry cutter or 2 butter knives, cut in the butter and shortening.
- Continue cutting in the butter and shortening until the butter/shortening is in pea sized lumps. You do not want to over incorporate the butter and shortening. Keeping the lumps of butter and shortening in the dough will yield a light and flakey crust. (if you are using two butter knives, hold the two knives in both hands, blade down, and cut in the opposite direction, starting in the middle with both knives together and pulling to the outer edges of the bowl. Repeat this process until the butter and shortening are in pea sized lumps.)
- See Sweet Dough Pie Crust for step-by-step photo instructions.
- Add the water a couple tablespoons at a time. Using a spatula to fold the water into the dough. Add enough water that the dough sticks together when you pinch it. You will want to be gentle, and not overwork the dough.
- Seperate the dough into two equally sized balls and wrap with plastic wrap. Refrigerate for a minimum of 30 minutes.
Pie Filling
- (If you are using already cooked chicken or turkey, skip this step) Season the chicken breast with salt and pepper. In a large heavy bottomed pot add 2 tablespoons of extra virgin olive oil and chicken breasts. Cook over medium low heat until the chicken breasts are fully cooked and browned on the outside.
- Remove the chicken from the pot and shred. If you are using leftover turkey or already cooked chicken, shred and measure out 4-5 cups of meat.
- In the same pot that you cooked the chicken in, over medium low heat, melt ½ cup of butter. Add in the diced onion and minced garlic cloves and saute until fragrant, about 2 minutes.
- Sprinkle the flour on top of the butter and stir to combine. It will start to create a thick and lumpy paste. This is called a roux and this is what will make the filling thick and creamy. Stir for 2 minutes to let the roux cook slightly.
- Stirring steadily, add all of the chicken broth. Stir until no lumps remain.
- Add the peas, corn, and parsley, and bring to a simmer.
- Add the shredded chicken or turkey into the filling, and stir to fully combine.
- Stirring constantly add in the heavy cream and season with salt and pepper (to taste).
- Remove from heat and set aside.
Assembling the Pot Pie
- Preheat the oven to 375°F and grab a 9" pie plate.
- In a small bowl whisk the egg with 2 tablespoons of water and set aside.
- On a large, lightly floured surface, roll out one of the pie crusts to about ¼" - ⅛" thickness. You want it to be about 13"-14" in diameter for a 9" pie plate.
- Carefully pick up the pie crust and place it in the pie plate. Gently press the pie crust down to ensure there are no air bubbles. Poke the bottom of the crust about a dozen times with a fork. This will allow air to escape during baking so that there are no air bubbles.
- Add the pot pie filling to the crust. You want the filling right to the top of the pie plate, but not overflowing. Set aside.
- Roll out the top crust to about 11" in diameter. While the crust is on the counter, with a sharp knife cut a few slits in the center of the pie crust (see pictures above). Set aside.
- Take the egg/water mixture and using your finger or a pastry brush, brush the egg mixture around the outer rim of the bottom pie crust.
- Gently place the top piece of pie crust on top and gently pinch around the edges to adhere.
- Using a sharp knife or kitchen shears, cut off the excess pie crust around the edge of the pie plate (see picture above).
- Crimp the edges of the crust.
- Brush more of the egg mixture all over the top of the pie.
- Bake for 50-55 minutes until golden brown. Serve immediately.
Save This Recipe! 💌
Notes
Nutrition
The nutritional information provided is an estimate based on an online nutrition calculator and it will vary based on the ingredients that you use.
Kellie says
The timing of this recipe is excellent! I love how you put the wise details on pie crust making- and roux, it’s totally shed light on how to be successful. You’re an amazing chef! I am thankful for you sharing your gift.
Jessica says
thank you so much! enjoy and happy cooking!
mtrinhtrieuan says
you cook very well
Jessica says
thank you!